Master Git Rebase with Git Fork. Learn how to integrate changes seamlessly, rewrite history, and maintain a clean commit structure
Why Rebase?
Rebasing keeps your commit history clean and linear, making it easier to follow changes.
It’s a great way to keep your branch up to date without cluttering the commit log with unnecessary merges.
Step 1: Switch to Your Feature Branch
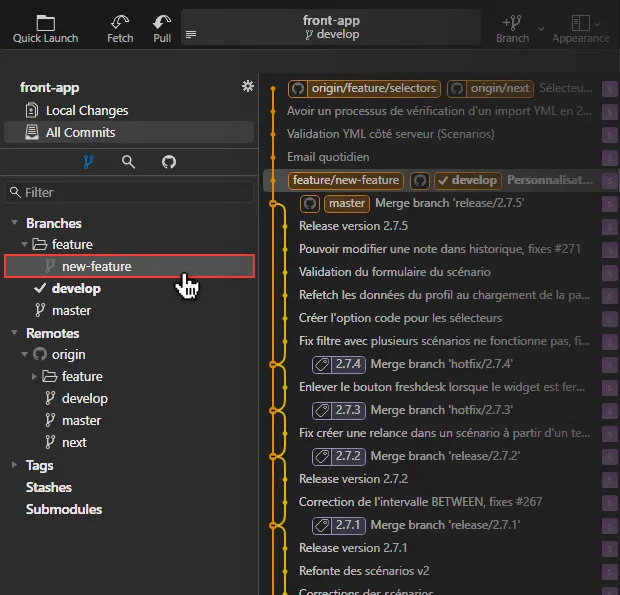
Let’s say you’re working on a feature/new-feature branch and want to rebase it onto the latest commit of develop.
Select your feature branch from the Branches pane and double-click to switch to it.
Step 2: Start the Rebase
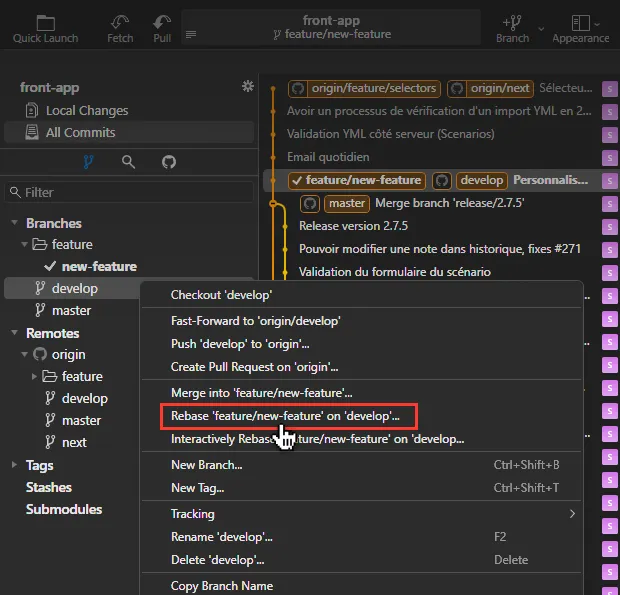
Now it’s time to rebase your feature branch onto develop to get the latest changes.
Right-click on the develop branch and select Rebase onto develop.
Git Fork will now attempt to apply the commits from your feature branch on top of the latest commits of develop branch.
Step 3: Handle Conflicts (if any)
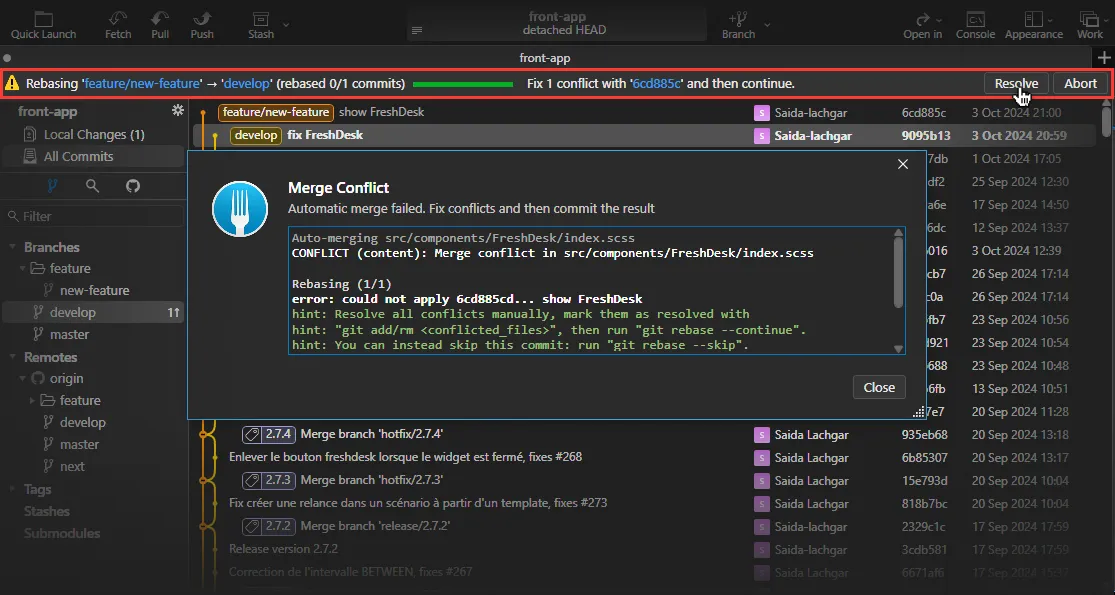
Sometimes, rebasing can result in conflicts. If this happens:
Git Fork will notify you of any conflicts.
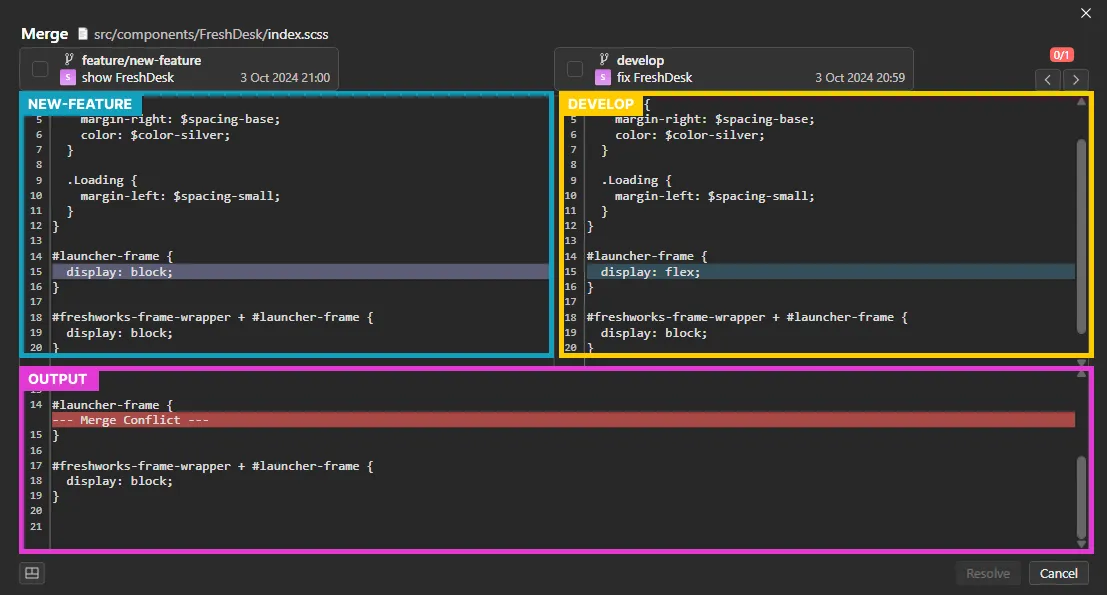
Click on merge ,so you can resolve conflicts by selecting which changes to keep. you can also keep both changes, or manually define the desired changes directly in the output panel
Once resolved, click Continue rebase and continue the rebase process.
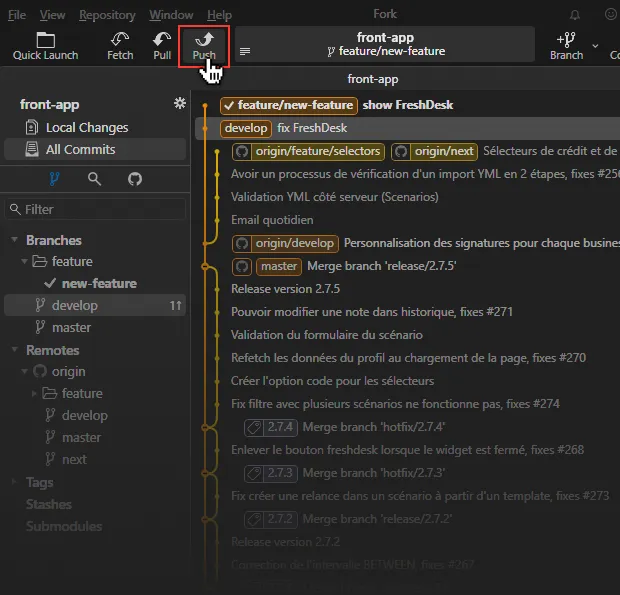
Step 4: Finalize and Push Changes
After successfully rebasing, you’ll need to push your updated branch to the remote repository.
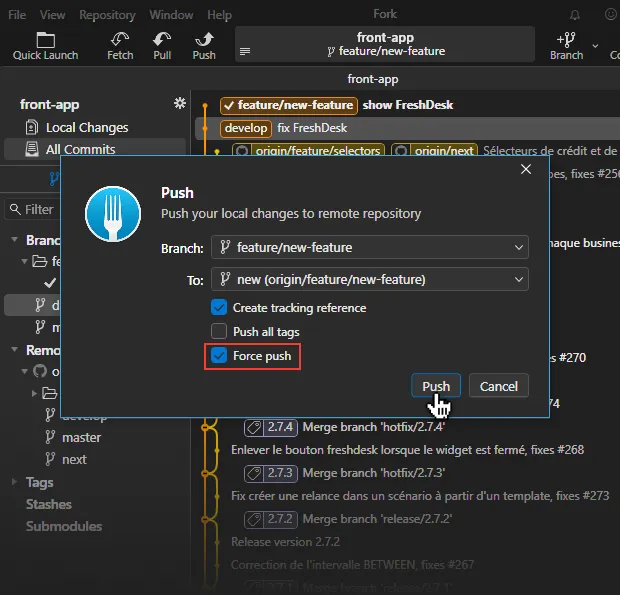
Click the Push button at the top.
You will need to check the option to force push since the branch’s history has been rewritten during the rebase.
Done!
And that’s it—you’ve just successfully rebased a branch using Git Fork without touching the terminal. Now your feature branch is in sync with develop, and the commit history looks clean and organized!