Why Use a Hotfix?
Hotfix branches allow you to quickly fix critical issues in production while keeping your main development flow uninterrupted. Once the fix is implemented, it’s merged back into both the master and develop branches, ensuring the patch is included in future development work.
Step 1: Check Your Branches
First, make sure you’re on the correct branch before starting the hotfix.
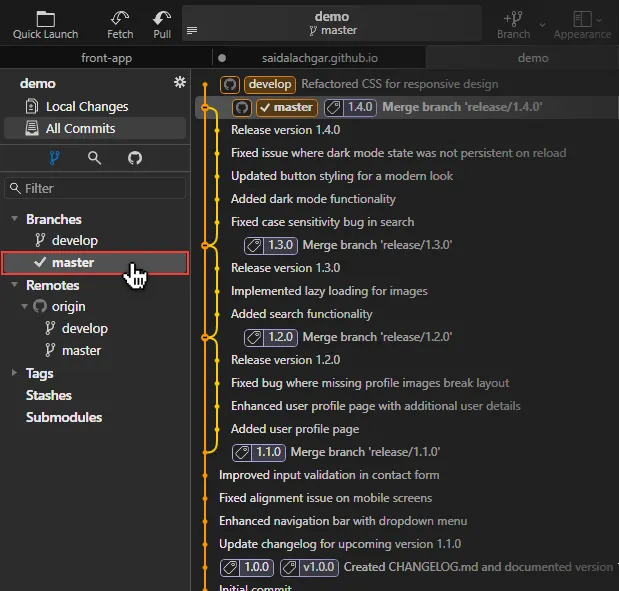
Ensure you’re on the master branch since hotfixes are based off of the production code.
Step 2: Create the Hotfix Branch
Next, you need to create a new branch specifically for your hotfix.
master and select New branch... Name the branch hotfix/x.x.x. 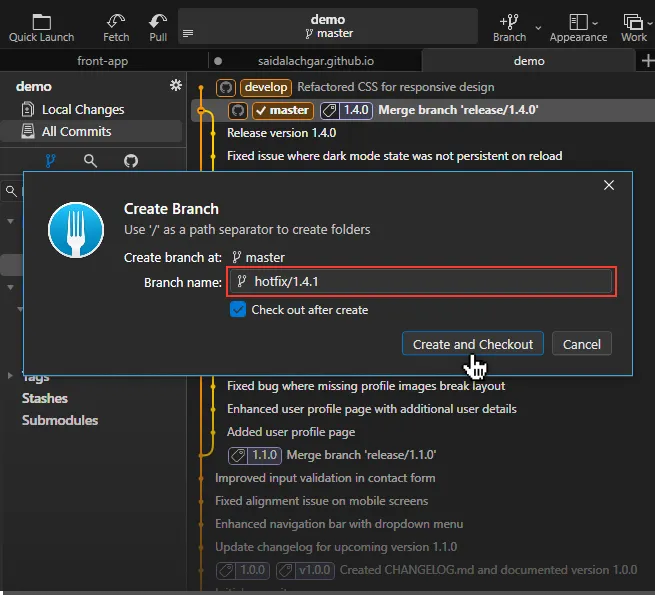
where x.x.x is your version number, eg : 1.4.1
Step 3: Push the Hotfix Branch to Remote
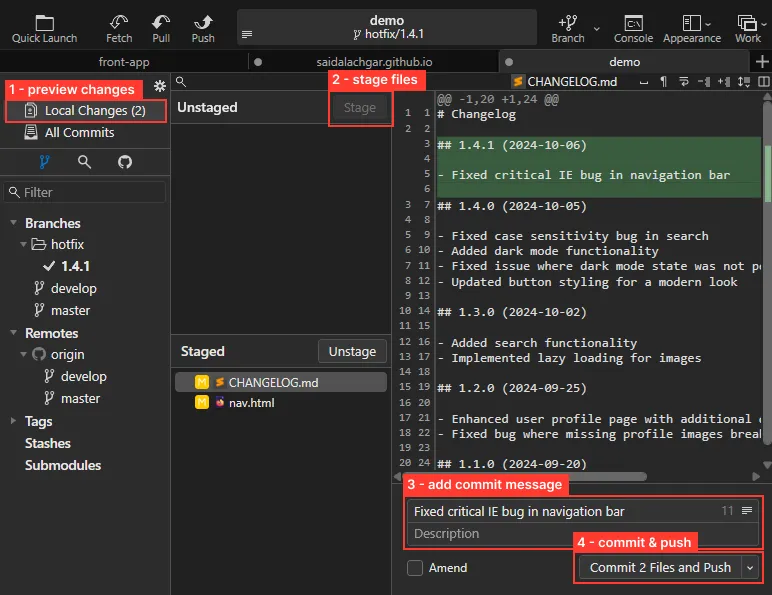
If you have a CHANGELOG.md file, make sure to update it with the new app version and changes made.
Step 4: Merge the Hotfix Into Master
With the hotfix branch ready, it’s time to merge it into master to apply the fix to production.
master to check out then right-click on hotfix/x.x.x and select Merge into ‘master’…, ensuring the merge option is set to —no-ff (no fast-forward). 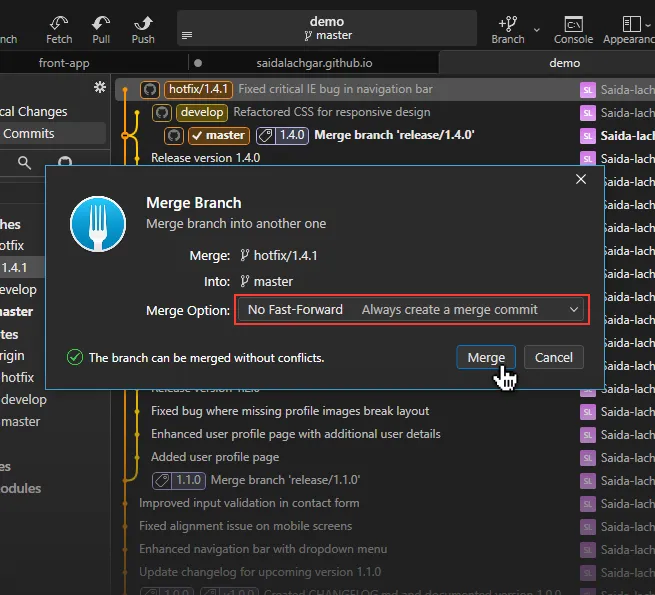
This will create a new commit on master with the message Merge branch 'hotfix/x.x.x', you can then click Push.
Step 5: Clean Up
master, the history may look messy like this: 
Let’s clean it up! 🧹
• Delete Hotfix Branch
Now that your hotfix has been applied and merged into master, it’s safe to remove the branch.
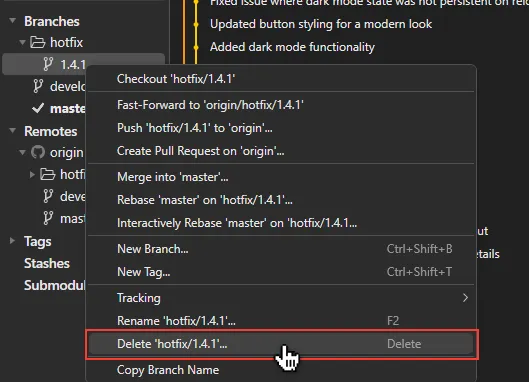
Ensure you check the option Also delete remote branch ‘origin/hotfix/x.x.x’ in the popup.
• Rebase develop
To keep your develop branch up to date, rebase it onto master. For more details on rebasing, check out this tutorial.

Step 6: Tag the Hotfix
Next, you’ll want to tag this new release version for future reference.
Right-click on the latest commit in master and select New tag….
1.4.1, ensure Push is checked, and click on Create and push. 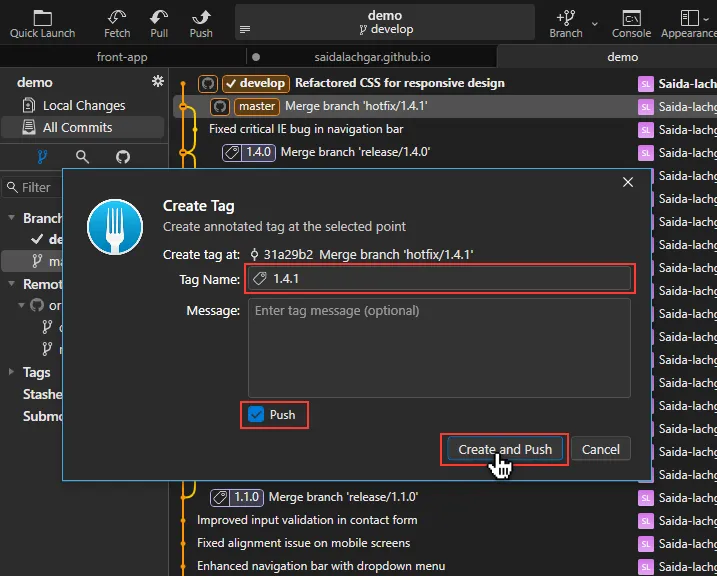

Done! 🎉
You’ve successfully handled a hotfix using the Gitflow Workflow, ensuring the fix is applied to both production and development branches.
💡 I personally like using Git Fork, but feel free to use any Git client or command line tool that suits you best. For those who prefer command line, here’s a minimal set of commands to achieve the same steps:
# Step 1: Ensure you're on the master branch
git checkout master

# Step 2: Create the hotfix branch
git checkout -b hotfix/x.x.x

# Step 3: Push the hotfix branch to remote
git commit -am "Your hotfix message"
git push origin hotfix/x.x.x

# Step 4: Merge into master
git checkout master
git merge --no-ff hotfix/x.x.x
git push origin master

# Step 5: Delete hotfix branch
git branch -d hotfix/x.x.x
git push origin --delete hotfix/x.x.x

# Step 6: Rebase develop onto master
git checkout develop
git rebase master
git push origin develop

# Step 7: Tag the release
git tag -a x.x.x -m "Release x.x.x"
git push origin --tags