1. Get a Domain Name
By default, GitHub provides a free domain in the form of your-username.github.io, but let’s be honest, it’s not the best-looking URL. To get a cooler domain name, you have a couple of options:
- Purchase a domain: I bought mine from Hostinger for just $1, but there are many domain providers out there.
- Free domain: You can get a free domain from Freenom. They offer top-level domains (TLDs) like
.tk, which works great for personal portfolios. Choose a domain name that reflects your brand, ideally including your name.
2. Build Your Portfolio
Next, develop your portfolio website. You can either:
- Download a portfolio template from the web and customize it.
- Or, if you want more control, create the entire website from scratch.
Whichever method you choose, make sure your portfolio showcases your work well!
3. Manage the Custom Domain
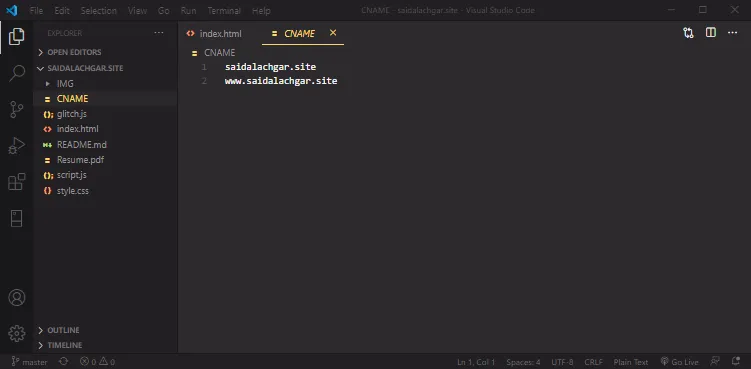
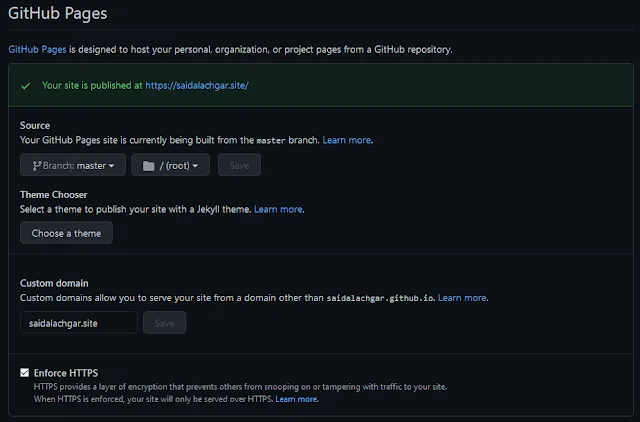
CNAME file in the root of your repository. This file should contain only your custom domain name, like yourdomain.com. 

185.199.108.153
185.199.109.153
185.199.110.153
185.199.111.153
4. Publish Your Portfolio
Now that your domain and website are ready, it’s time to deploy:
- Create a new repository on GitHub.
- Push your portfolio’s code to this repository.

And voilà! Your site is now live on your custom domain 🎉.
Final Thoughts
This method is ideal for hosting static websites like portfolios. It’s a quick and affordable way to get your site online with a professional-looking domain. Keep in mind, though, that GitHub Pages doesn’t support back-end features like PHP. But for static sites, it’s perfect!